Custom worksheets are just a few mouseclicks away.

Do you feel a bit lost, don't you know how it works or where to start?
As you may know, dw-math is all about creating your own custom made worksheets. So ,the first thing you need to have is a place where you can store your worksheets. We provide this place at no charge, as look as you keep returning every few months or so, The only thing you have to do is to register so we can identify you as you are returning to revisit your worksheets. You can register here for a free account.
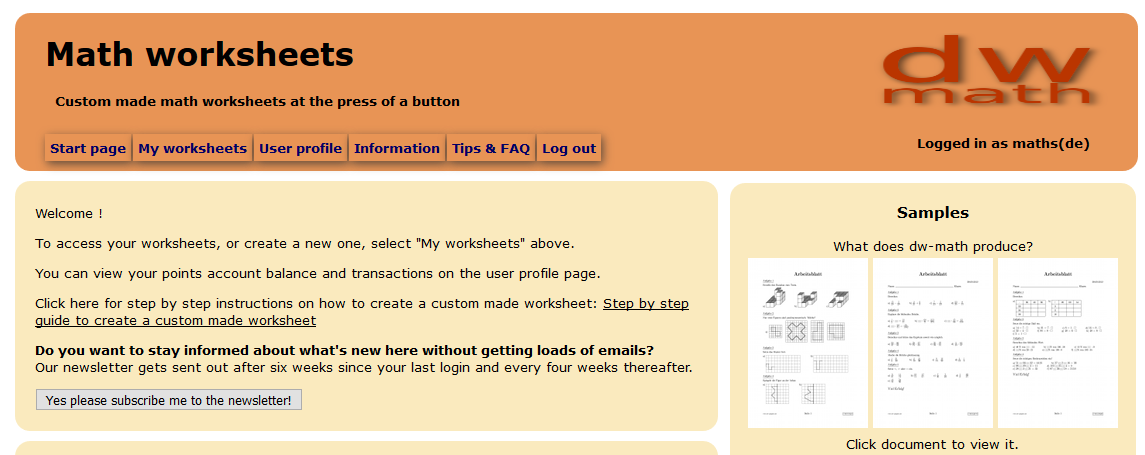
Go to the main page and login with your user name and password. You will then be taken to the starting page, which looks like that:
The worksheets you have been created and you may still be working on are stored in the "My worksheets" storage area. You can view them by clicking the "My worksheets" tab on the main menu bar. Here you can create new worksheets, too.
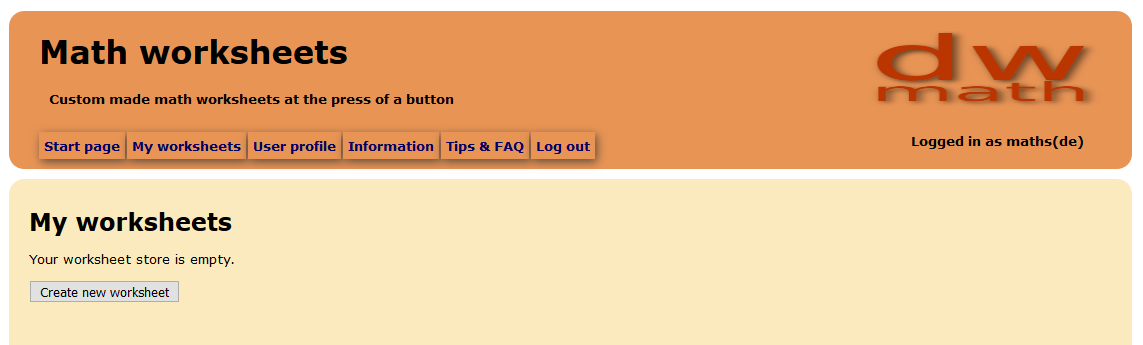
When you visit this place for the first time, it will look as empty as this one. Now click on "Create new worksheet" to move on to your first worksheet, waiting to be populated by you:
You can edit a worksheet here - or create a new one. It looks like this
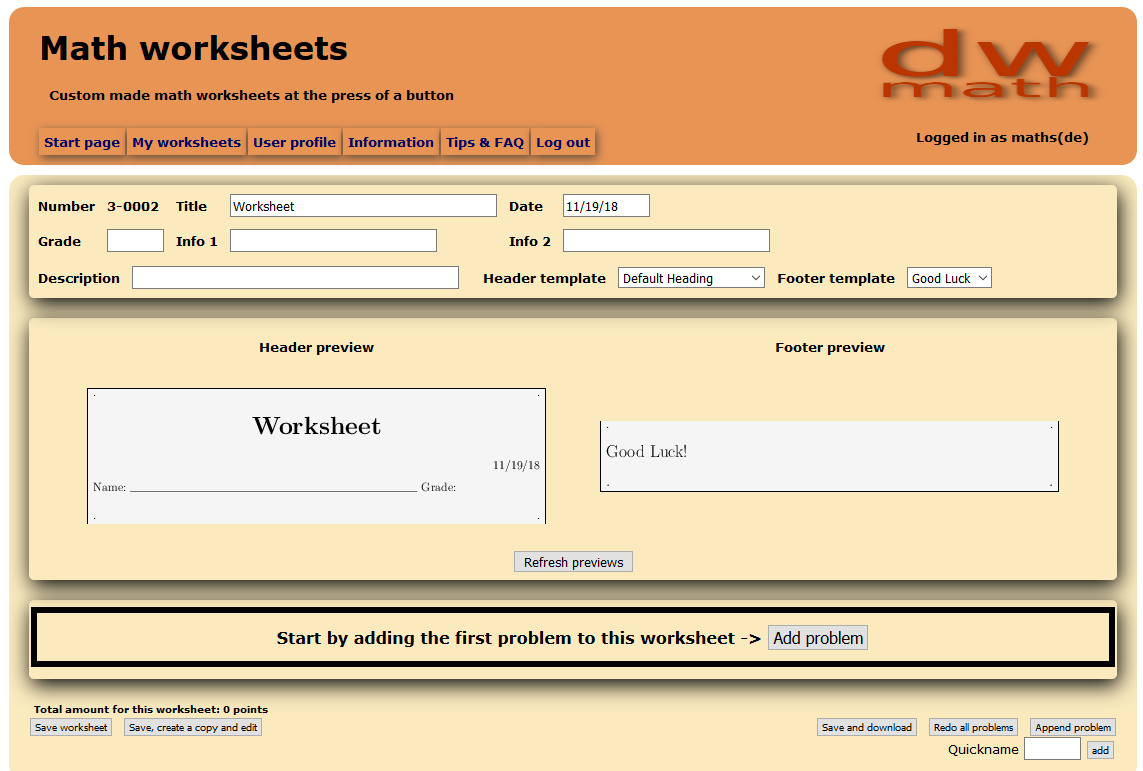
The top area contains the header data of the worksheet. There is a number, or handle, that is generated by the system. Other fields may be freely populated with information. These are named Title, date, level, info 1, info 2 and description. The labels are just a suggestion, you can enter any information that you might find useful. Some information may appear on your worksheet, depending on the header or footer templates you choose. They may help you to retrieve your worksheet, as they may be used as sort criteria when viewing the worksheet storage list.
As part of the header, there is the selection of header and footer templates. The header appears at the beginning of the worksheet, it is prepended to the actual arrangement of problems. In a similar way, the footer appears at the end of the worksheet. It may contain header information fields or just a "Good luck!" closing, again depending on the footer template you choose. Templates can be chosen using the corresponding drop-down listboxes. Click Refresh previews to have the previews updated when you change on of the templates or header data and see what it is going to look like.
After the preview images for the header and footer comes the heart of the worksheets, the problems section. Initially, it will be empty and only contain a button that invites you to start adding problems. It will lead you to the problem selection page.
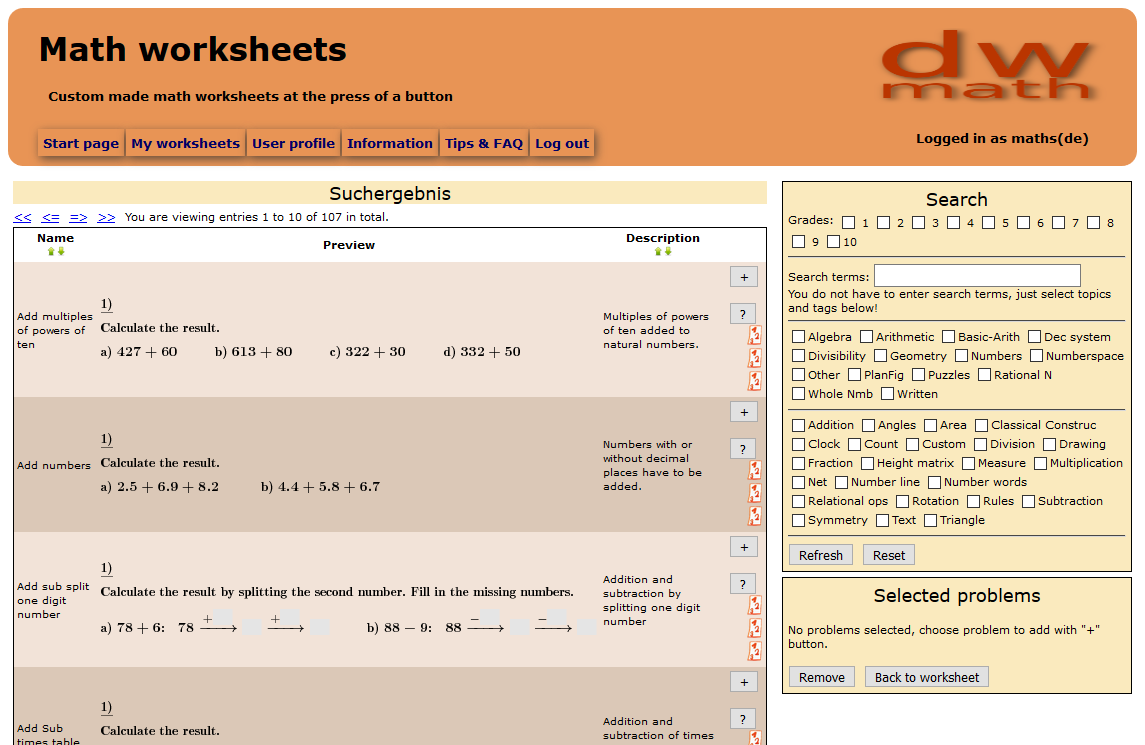
When you enter the page, it will show the first page of a list of all available problems. You do not have to scoll all of these, we have tried to make it as easy as possible for you find the problems you are looking for.
On the right hand side, there is the area of the search criteria you can use to narrow down the problems listed in various ways. We suggest to refine your search from top to bottom, as the criteria list further down will change depending on selections you do further up in the list.
So it is advisable to first select a range of levels you are targeting. A selection of "No Levels" will have you see all problems, as soon as you start selecting levels, only problems corresponding to these levels will be displayed.
Next, you should choose topics to consider. As you check boxes in this block, you will note that the tags list will change to reflect problem availability for these topics.
The tags selection is a bit different - while the topics list will make the problem and tags list reflect the problems that match any of the topics (just like the level selection works), adding marks to the tags list will have the results list show only problems that match all of the tags.
We feel this approach of choosing from existing lists and narrowing down by checking boxes is the most efficient one to find problems that may match your intentions. However, if you rather want to enter some keywords, we have set up a full text search function for you. There is a form field titled "Search terms:" where you can enter any search terms that may describe what you are looking for. The words recognized will be shown below this box and you will be able to switch them on and off just like the topics or tags. Give it a try!
If you get stuck and somehow no problems at all are shown anymore, you can click the "Reset" button to start over, reset all search criteria and see all problems again.
On the left, you find the list of search results, with the math problems matching your search criteria. The preview may show a sample problem that may not fit your required level of difficulty or may even look like it is not appropriate for the level(s) you selected. Please note that the level of difficulty may be adjustable through parameters that are adjustable for this problem.
Possible actions in the search result list
When you have collected the problems to be added in your basket, you are ready to check-out and add them to your worksheet. Click on "Add to worksheet" to do that. Now the problems will be generated for you. This may take a few seconds, depending on the number of problems in your basket.
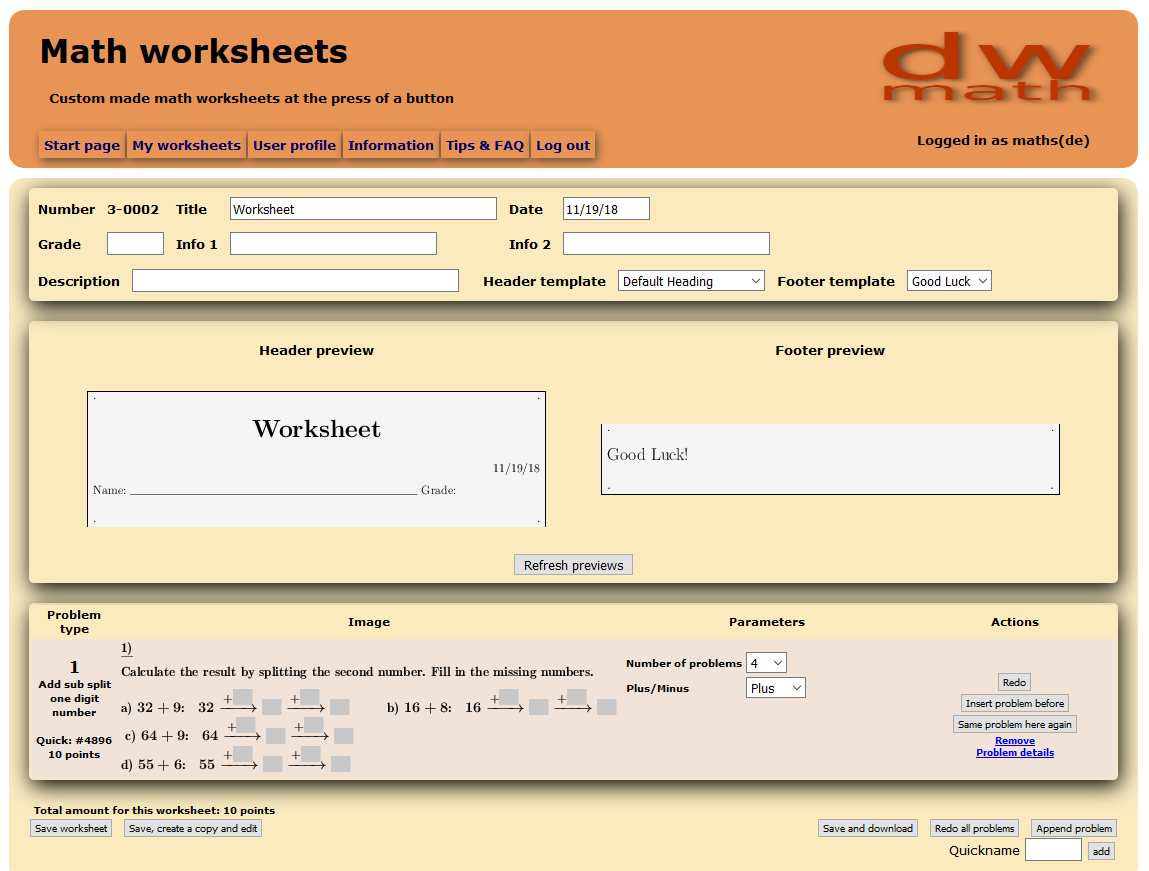
You will then be taken back to your worksheets, where you can review the newly added problems.
The problem section of your worksheet now shows the problem or problems you just added. Every problem has been generated with a standard default set of parameters.
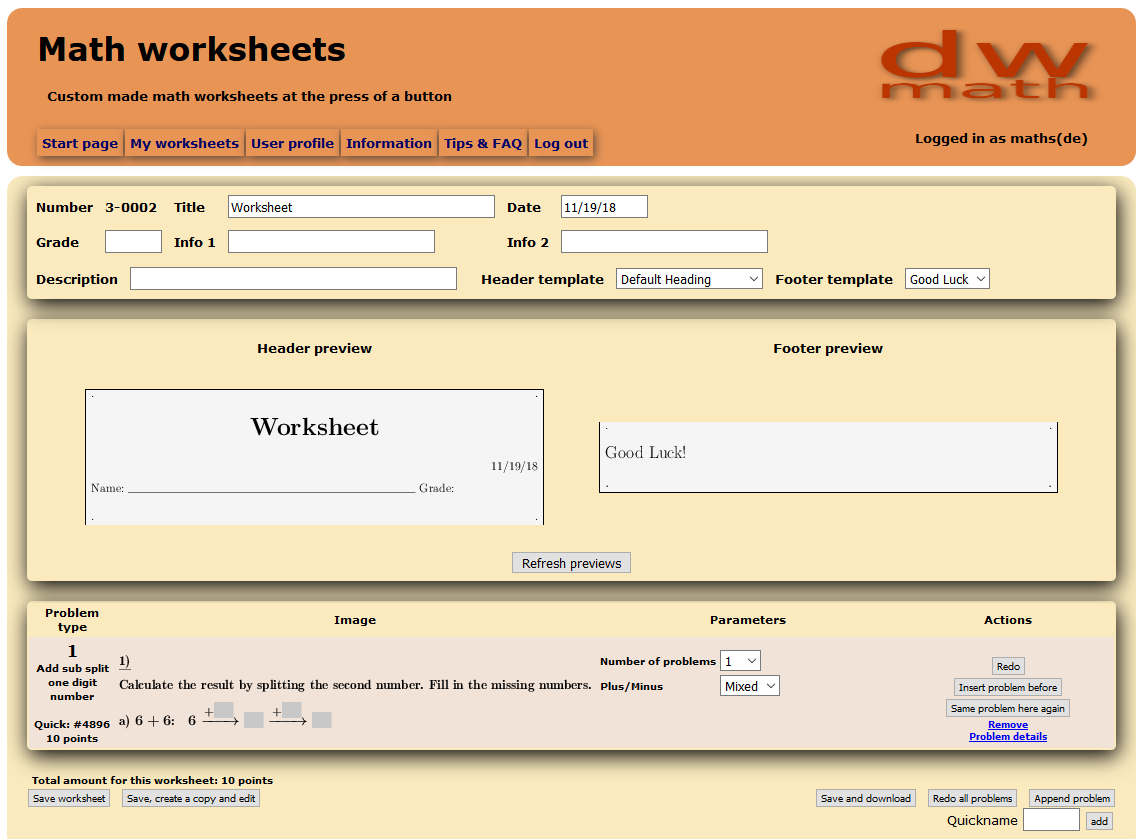
In this example, the worksheet contains only one problem
For each problem there is a row with the following information:
Other possible actions are:
When you have finished putting together your worksheet, you can download it as a pdf file. Click on the "Save and download" button and the worksheet and solution sheet will be generated. After a few seconds, you will be forwarded to a page where you have to confirm the payment.
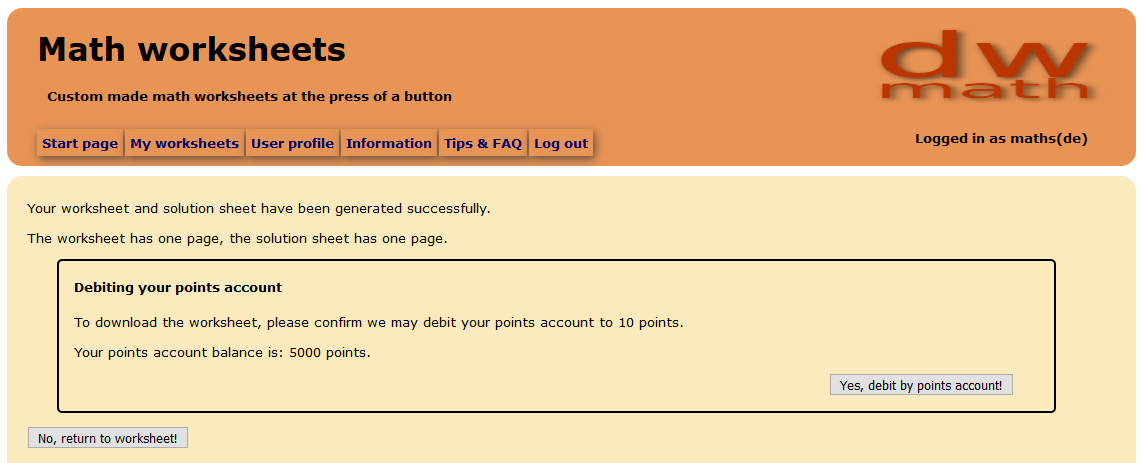
Please note it is stated that the sheets have been generated successfully. For both the worksheet and solution sheet, the number of pages is given. If you would like to amend your worksheet to be shorter, you can now return to the worksheet editor to do some changes.
If you want to download the worksheet now, proceed by clicking the "Yes, debit my points account!" button and you will be taken to the download page:
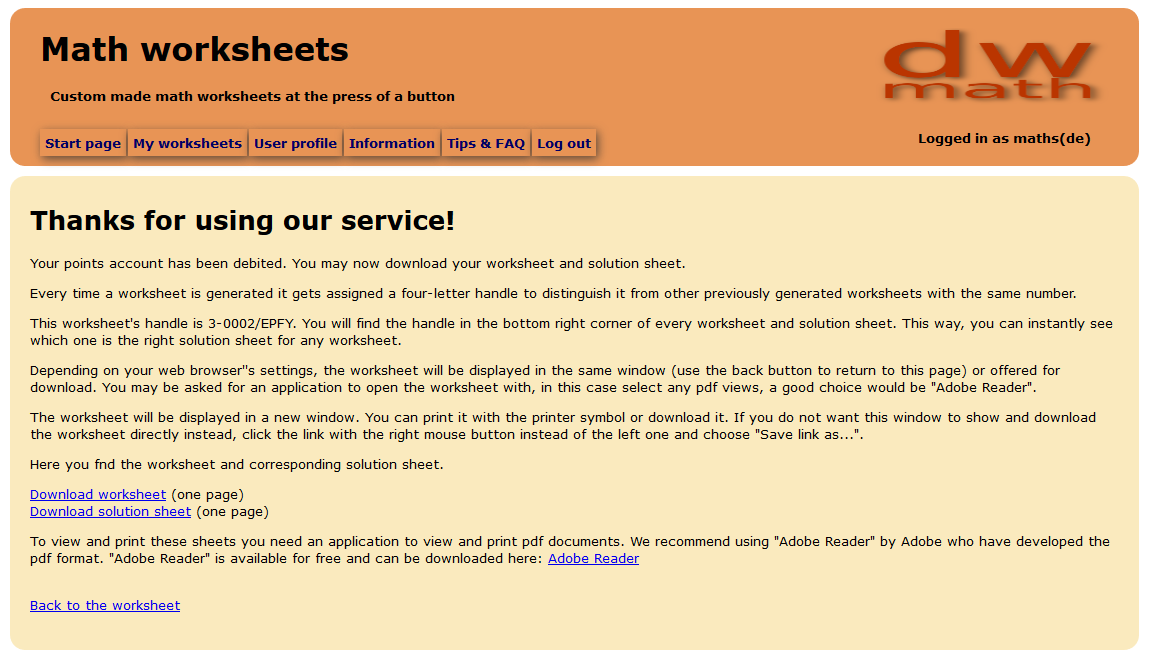
Here you will find the worksheet and solution sheet for download.
If you would like to have another worksheet of the same type with different problem values, return to the worksheet editor, click "Redo all problems" to re-generate all problems, then proceed to the download page again.